aardvark
Building your first Aardvark gadget
This is a simple step by step guide to building your first Aardvark gadget. Assuming you have the pre-requisites installed already, this will take about ten minutes.
This guide uses Typescript, Visual Studio Code, and npm. Using Javascript to build your gadget should be straightforward… just use .js files below instead of .ts files and omit the type declarations.
Step 0 - Pre-requisites
There are some pre-requisites to following the rest of this guide. Specifically you need to have the following applications installed:
- Visual Studio Code
- npm
- typescript - Once npm is installed, you can install typescript with
npm install -g typescript
There’s nothing in the instructions below that cares what platform you’re running on, but these instructions have only been tested on Windows 10. Aardvark itself also currently only runs on Windows.
Step 1 - Initialize an empty gadget
The Aardvark init tool will help you create a mostly-blank project in the current directory.
E:\gettingstarted>npm init "@aardvarkxr"
Aardvark gadget project create script (0.10.9)
? What is the package name to use for your gadget? mygadget
? What is the package name to use for your gadget? mygadget
? What is the user-facing name of your gadget? My Awesome Gadget
? What is the user-facing name of your gadget? My Awesome Gadget
? Does your gadget use panels (i.e. 2D quads in the world)? (Y/n)
? Does your gadget use panels (i.e. 2D quads in the world)? Yes
? Texture width (1024)
? Texture width 1024
? Texture height (1024)
? Texture height 1024
? Does your gadget start other gadgets? (y/N)
? Does your gadget start other gadgets? No
? Does your gadget join multi-user rooms? (y/N)
? Does your gadget join multi-user rooms? No
? Do you want to debug with VS Code? (Y/n)
? Do you want to debug with VS Code? Yes
Your answers:  {
  packageName: 'mygadget',
  gadgetName: 'My Awesome Gadget',
  usesPanels: true,
  width: 1024,
  height: 1024,
  startsGadgets: false,
  joinsRooms: false,
  wantsVSCode: true
}
Using @aardvarkxr/aardvark-react@^0.10.9 and @aardvarkxr/aardvark-shared@^0.10.9
Created ./src
Added manifest.webmanifest
Added tsconfig.json
Added package.json
Added src/styles.css
Added src/main.tsx
Added src/index.html
Created ./src/models
Added src/models/placeholder.glb
Added webpack.config.js
Created ./.vscode
Added .vscode/launch.json
This results in the following files:
E:\GETTINGSTARTED
|   package.json
|   tsconfig.json
|   webpack.config.js
|
+---.vscode
|       launch.json
|
\---src
    |   manifest.webmanifest
    |   index.html
    |   main.tsx
    |   styles.css
    |
    \---models
            placeholder.glb
Now that you have a gadget project, open it in Visual Studio code.
E:\gettingstarted> code .
Step 2 - Build your gadget for the first time
In the terminal window in Visual Studio code, you need to tell npm to install all the dependencies of your gadget.
This will download a bunch of typescript and javascript files into E:\gettingstarted\node_modules.
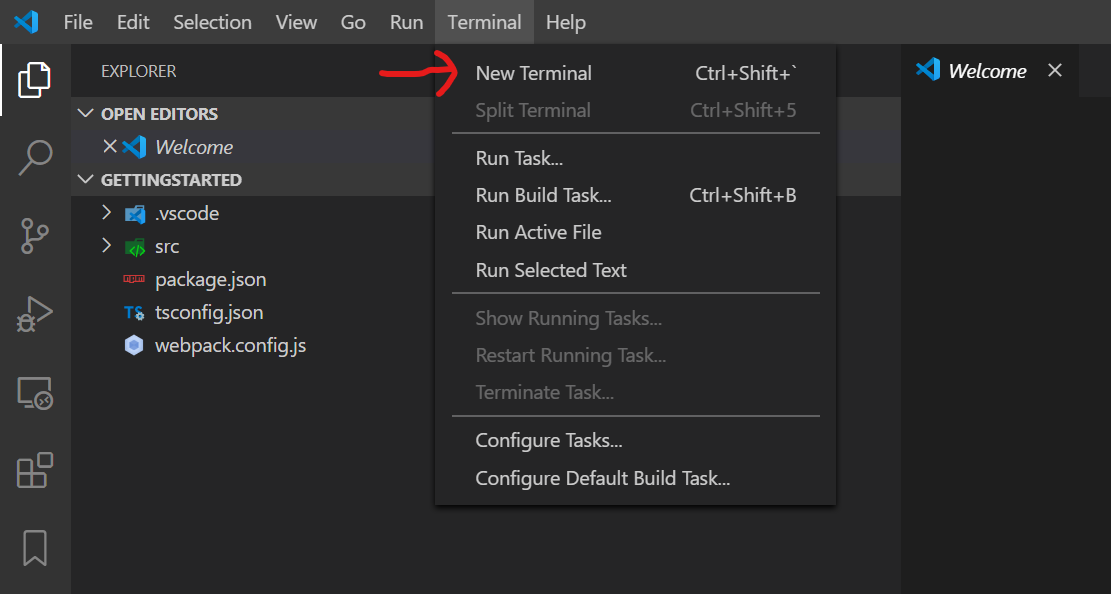
First, open the terminal window from the Terminal menu:

In the pane that appears, run npm install. You will need to do this whenever you change package.json to add dependencies. This guide will walk through enough npm commands to get a gadget up and running, but if want to learn more about npm An Absolute Beginner’s Guide to npm would be a good place to start. (This output was truncated because npm loves to spam the console, and the specific spam varies from week to week depending on other people’s modules, the specific npm version, security alerts, and the phase of the moon.)
PS E:\gettingstarted> npm install
npm WARN deprecated request@2.88.2: request has been deprecated, see https://github.com/request/request/issues/3142

> node@12.16.1 preinstall E:\gettingstarted\node_modules\node
> node installArchSpecificPackage

+ node-win-x64@12.16.1
added 1 package in 1.019s
found 0 vulnerabilities

npm notice created a lockfile as package-lock.json. You should commit this file.
npm WARN optional SKIPPING OPTIONAL DEPENDENCY: fsevents@^1.2.7 (node_modules\chokidar\node_modules\fsevents):
npm WARN notsup SKIPPING OPTIONAL DEPENDENCY: Unsupported platform for fsevents@1.2.12: wanted {"os":"darwin","arch":"any"} (current: {"os":"win32","arch":"x64"})
npm WARN mygadget@0.1.0 No repository field.
npm WARN mygadget@0.1.0 No license field.
...

added 999 packages from 1189 contributors and audited 54181 packages in 31.898s

21 packages are looking for funding
  run `npm fund` for details

found 0 vulnerabilities
Now that the dependencies are installed we can start the actual build.
PS E:\gettingstarted> npm start

> mygadget@0.1.0 start E:\gettingstarted
> webpack --env=dev --watch --progress

10% [0] building 0/0 modules 0 active
webpack is watching the files...

Hash: 7761bd5deb168075e44e
Version: webpack 4.42.1
Child
    Hash: 7761bd5deb168075e44e
    Time: 3014ms
    Built at: 04/04/2020 9:47:13 AM
                     Asset       Size  Chunks             Chunk Names
              ./index.html  297 bytes          [emitted]
      manifest.webmanifest  168 bytes          [emitted]
                  index.js   10.9 MiB    main  [emitted]  main
                 main.d.ts   12 bytes          [emitted]
    models/placeholder.glb   9.38 KiB          [emitted]
                styles.css  391 bytes          [emitted]
    Entrypoint main = index.js
    [0] util (ignored) 15 bytes {main} [built]
    [1] util (ignored) 15 bytes {main} [built]
    [2] buffer (ignored) 15 bytes {main} [optional] [built]
    [3] crypto (ignored) 15 bytes {main} [optional] [built]
    [./node_modules/webpack/buildin/global.js] (webpack)/buildin/global.js 472 bytes {main} [built]
    [./node_modules/webpack/buildin/module.js] (webpack)/buildin/module.js 497 bytes {main} [built]
    [./src/main.tsx] 3.67 KiB {main} [built]
        + 167 hidden modules
    Child html-webpack-plugin for "index.html":
         1 asset
        Entrypoint undefined = ./index.html
        [./node_modules/html-webpack-plugin/lib/loader.js!./src/index.html] 428 bytes {0} [built]
        [./node_modules/webpack/buildin/global.js] (webpack)/buildin/global.js 472 bytes {0} [built]
        [./node_modules/webpack/buildin/module.js] (webpack)/buildin/module.js 497 bytes {0} [built]
            + 1 hidden module
Exactly what npm start does is controlled by the scripts section of the gadget’s package.json file.
	"scripts": {
		"build": "webpack --env=production",
		"start": "webpack --env=dev --watch --progress"
	},
By default the init script sets package.json up to run a tool called webpack to bundle all the code and other assets for the gadget up into the dist directory, and then watch the source files for any changes.
Changing any of the source files will cause webpack to build again and update the output files automatically.
At this point the output directory should look like this:
E:\GETTINGSTARTED\DIST
|   manifest.webmanifest
|   index.html
|   index.js
|   main.d.ts
|   styles.css
|
+---models
        placeholder.glb
The tsconfig.json and webpackconfig.js files in your gadget’s source tree control this transpile and bundling process. For more details on how all of that works, How to Setup TypeScript with Webpack 4 is a good introduction.
Step 3 - Running your gadget for the first time
In order for Aardvark to load your gadget, you will need it to be available over HTTP. The easiest way to do that is to use a local development server. http-server (available via npm) is a reasonable choice. You can install it globally like this:
E:\gettingstarted>npm install -g http-server
Then run it on the dist directory of your gadget:
E:\gettingstarted>http-server dist --cors -c-1
Starting up http-server, serving dist
Available on:
  http://<your IP address>:8080
  http://127.0.0.1:8080
Hit CTRL-C to stop the server
By default http-server will run on port 8080, but many other things also default to port 8080, so depending on what else you’re running it may be on another port. See the output from the command to check which port it is actually using.
The –cors option allows all the served content to be loaded by any script in any page via the Access-Control-Allow-Origin header.
This is necessary for the manifest.webmanifest and any model files so that the various parts of Aardvark can load these resources.
You will need to ensure that wherever you host your gadget also returns Access-Control-Allow-Origin: * for the web manifest file and any model files.
The -c-1 option disables the cache, which is likely what you want in a dev environment.
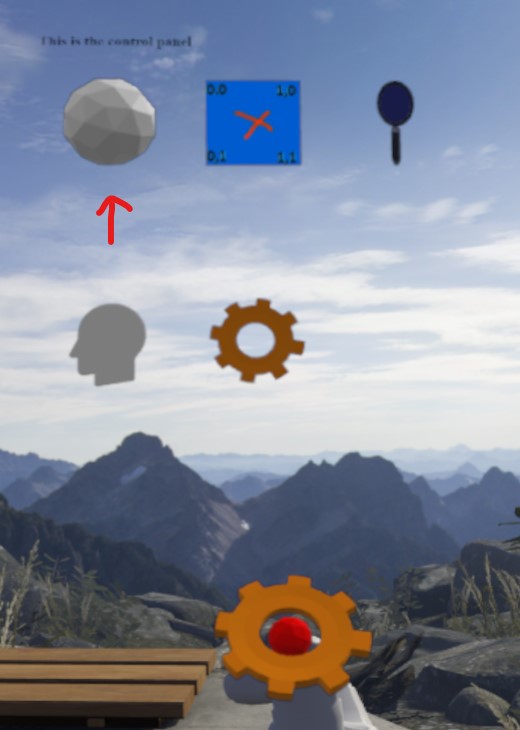
Now you can open your gadget in a browser to get a favorite button. http://localhost:8080/ is the default link, but you may need to adjust that URL to use whatever port the HTTP server ended up listening on. Whenever Aardvark is running, this page will have an “Add to favorites” button that will add that gadget to your favorites list. At that point you can spawn the gadget from inside VR by using the tab with the star icon in the gadget menu.
The white sphere is the placeholder model.

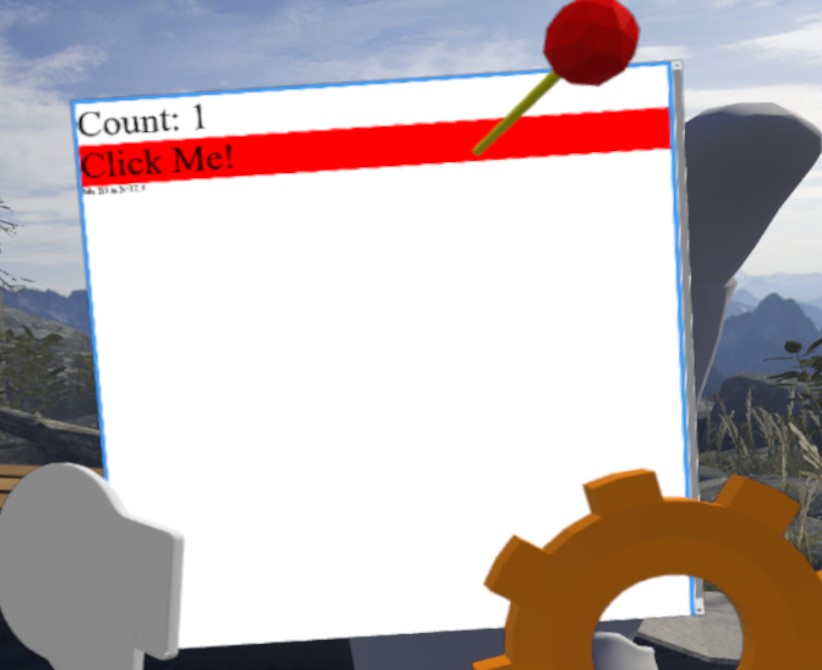
If you grab the placeholder sphere icon, you’ll see your gadget’s panel.

Step 4 - Understanding manifest.webmanifest
Your gadget’s src directory contains a file called manifest.webmanifest that has the following in it.
{
	"xr_type": "aardvark-gadget@^0.10.9",
	"name": "My Awesome Gadget",
	"icons": [
		{
			"src": "models/placeholder.glb",
			"type": "model/gltf-binary"
		}
	],
	"aardvark": {
		"permissions": [
			"scenegraph"
		],
		"browserWidth": 1024,
		"browserHeight": 1024,
		"startAutomatically": false
	}
}
Every gadget needs to define a manifest file to tell Aardvark how to deal with that gadget. The fields in the manifest file are:
- name - The user facing name of the gadget. This isn’t currently shown to a user anywhere, but please set one anyway.
- icons - The URL of a glTF model to use to represent this gadget in the gadget menu. If this does not start with HTTP or HTTPS it must be a relative file path (using forward slashes) to the model file that is relative to the gadget manifest file itself.
- permissions - Aardvark has a rudimentary permission system that allows gadgets to have access to certain blocks of functionality. Possible values are:
- scenegraph - The gadget is allowed to submit a scene graph. Pretty much every gadget has this permission.
- room - The gadget is allowed to join and leave rooms on behalf of the user.
- master - The gadget is the master gadget and is allowed to start other gadgets. You shouldn’t set this in your own gadget.
- browserWidth, browserHeight - The width and height of the browser that is created for this gadget. Gadgets that don’t use panels should set this to small numbers like 16x16 to save on video memory.
- startAutomatically - If this is true and the gadget is installed, the gadget will start automatically when Aardvark starts. This is useful for gadgets that don’t have a grabbable at their root. Defaults to false.
Step 5 - Understanding the gadget scene graph
main.tsx is a typescript file that defines the main React component in the simple starter gadget.
Understanding what React components are and how they work would go a long way toward understanding how Aardvark works, so it may be worth reading about that in their own getting started guide.
This guide won’t get into the Reactisms of the gadget itself and will instead focus on the Aardvarkisms.
The core of an Aardvark gadget is its scene graph.
This tells Aardvark what do draw for the gadget, as well as how the user should be able to interact with that gadget.
It is constructed of React components that follow the Av
This is the render function of the TestPanel component in main.tsx:
public render()
{
	let sDivClasses:string;
	let scale = 0.2;
	switch( this.state.grabbableHighlight )
	{
		default:
		case HighlightType.None:
			sDivClasses = "FullPage NoGrabHighlight";
			break;

		case HighlightType.InRange:
			sDivClasses = "FullPage InRangeHighlight";
			break;

		case HighlightType.Grabbed:
			sDivClasses = "FullPage GrabbedHighlight";
			break;

		case HighlightType.InHookRange:
			sDivClasses = "FullPage GrabbedHighlight";
			break;

	}

	return (
		<div className={ sDivClasses } >
			<div>
				<AvGrabbable updateHighlight={ this.onHighlightGrabbable }
					onGrabRequest={ this.onGrabRequest }
					dropOnHooks={ true }>
					<AvSphereHandle radius={0.1} />

					<AvTransform uniformScale={ scale }>
						<AvPanel interactive={true}
							onIdAssigned={ (id: EndpointAddr) => { this.m_panelId = id } }/>
					</AvTransform>
				</AvGrabbable>
			</div>
			<div className="Label">Count: { this.state.count }</div>
			<div className="Button" onMouseDown={ this.incrementCount }>
				Click Me!
				</div>

			{ this.m_panelId &&
				<div>
					My ID is { endpointAddrToString( this.m_panelId as EndpointAddr ) }
				</div>
			}
		</div>
	)
}
This is the scene graph portion of that function:
<AvGrabbable updateHighlight={ this.onHighlightGrabbable }
	onGrabRequest={ this.onGrabRequest }
	dropOnHooks={ true }>
	<AvSphereHandle radius={0.1} />

	<AvTransform uniformScale={ scale }>
		<AvPanel interactive={true}
			onIdAssigned={ (id: EndpointAddr) => { this.m_panelId = id } }/>
	</AvTransform>
</AvGrabbable>
The Aardvark React documentation describes all the available node types in Aardvark, as well as what their properties are. A few of those are detailed below to explain how they work in the test panel gadget.
AvGrabbable
There is often a node of this type at the root of gadgets. It allows the user to grab the gadget and move it around.
This grabbable defines an optional updateHighlight callback function and uses that function to change the color of the panel when a grabber is near the gadget, or when the grabbable is actually being moved around. The specific highlighting being used here is more of a test/demonstration than something you would want to use in your own gadget, but it shows you how to hook up this sort of highlighting. You could use the same callback to change the scale of an object, show or hide things, change the color of a model, etc.
AvSphereHandle
Grabbables themselves don’t define the region that they can be grabbed in. They rely on handles for that.
In this case the grabbable is using a sphere handle with a radius of 0.1 meters (because all distance values in Aardvark are in meters). This sphere is centered around its parent transform in the scene graph. In this case, because there are no transform nodes above it in the scene graph, the handle is centered around the gadget itself.
AvTransform
Almost every gadget will use an AvTransform node somewhere.
This node sets the translation, scale, and rotation of its children.
AvTransform sometimes works in concert with the AvOrigin node, which sets the scene graph transform to some absolute point like:
- /user/head - the user’s head with the negative Z axis coming out between their eyes and the positive Y axis going up out the top of their head.
- /user/hand/left, /user/hand/right - the user’s hand, with the negative Z axis going forward away from their hand.
- /space/stage - The center of the user’s room-scale playspace.
AvPanel
This is another very common node type.
It tells Aardvark to present the contents of the gadget’s browser as a 2D panel in the world.
The size of this panel defaults to 1m by 1m, which is pretty big for a display surface, so it is often paired with an AvTransform node that scales down the panel.
That’s what’s happening here with the AvTransform parent of the AvPanel node.
For panels that want user interaction through simulated “mouse” clicks, they can set the interactive property.
At that point onClick and all the other expected DOM and React events will come through for that panel.
Step 6 - Come ask for help!
That should be enough to get you going. As you run into issues building your gadget, please don’t hesitate to reach out in the Aardvark Slack. That’s how we’re going to make the API, this guide, the documentation, and all of Aardvark better.
Thanks for reading